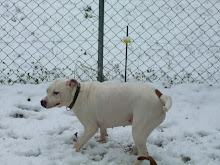
I have a friend in Dallas, TX who runs a Pittie Rescue and asked for fundraising items and I made several little puppies for her gift baskets. Since I have a house full of Pitties and I LOVE them best I knew I had to send her something. I made a LITTER of PITTIES! =)
Several people have asked how I made them so here is a little picture tutorial. They are really cute and really fast!!
Don't know why the Supplies are upside down but what you will need for 1 puppy is:
1 regular wash cloth
1 sheet of felt for ears
Pom-Pom for nose
Extra-Long satin pins (to stick nose onto body)
Clear rubber bands. I used the Goody brand from the hair section in WalMart
3/8" ribbon
lighter
Wilton Favor Kit (packaging, so optional)
Most wash cloths are folded at the store so work off the existing crease unless there is a decorative band like the one above. Fold those like the one pictured so we can hide that band when rolling the wash cloth for legs. You will now roll the opposite sides toward the center crease. The tighter you roll, the skinnier your puppy!
Next, get a rubber band ready on your fingers and fold the rolled wash cloth in half with the crease on top. Place your rubber band at almost half. This will create the Puppy's neck. You want the legs to be just slightly longer than the head.
You will now create the "muzzle" or "face" of the puppy and secure with a rubber band.
Use the template provided to create the ears out of your chosen felt color. I have a yellow wash cloth and I chose brown felt ears.
Using your finger, gently push the felt through the head and adjust the ears to your liking.
For mine, since they are not intended as toys for children or dogs, I didn't secure any items permanently. If the recipient wants to take the puppy apart and use the wash cloth for its intended purpose, no harm no foul. If you would like to create a puppy for a toy, please remember that small items can cause a choking hazard and glue your nose, ears and bow/collar on securely!
I used an extra-long satin pin (from the sewing section) to put my pom-pom nose onto my puppy like this.
Next, tie a length of grosgrain ribbon around the puppy's neck and tie a bow. From point to point, my ribbon was 17 1/2" long. This is to conceal the rubber band at the neck as well as make your puppy SUPER cute! Be sure to use the lighter to seal the ends of the ribbon so it will not fray/unravel.
Ta Da!! You're done!! I put my puppies in the Wilton Favor Kit bags. They are intended for stacks of cookies or a cupcake and come with the little cardboard disks to make the bags sit flat. Perfect for packaging your PUPPY for gift giving!! You will find these in the cake decorating isle of WalMart. Have fun with these little guys!!! =)
You will need to enlarge this but this is the ear template I created. My ears are 6 1/4" long and the roundest part of the ear is 1 1/2" wide.


No comments:
Post a Comment