Friday, October 3, 2014

Grace Ennis Graphic Knitting Patterns Pipe Dream Socks, #7262 from 1953

This is just the leg portion of Sock #1 of Grace Ennis' Pipe Dreams but wanted to show some progress.


 This is knit using Knit Picks Palette yarn in Camel Heather as the Main Color, Black, Oyster Heather, Bison and Serrano.  The smoke is knit in Trendsetter Yarns 100% Angora yarn.  SO soft and fuzzy!


See!!


That fuzzy little stuff is EVERYWHERE!!  This is the front of my shirt.  Looks like I've been holding a CAT!  WOW!


Tuesday, September 30, 2014

Grace Ennis #7217 Triangle Overlay Socks


I cast on the Triangle Overlay Socks back in the summer and got so far, put them down and didn't think about them again.  I picked them back up last week and completed them.  They are really easy, large blocks of color, no floating.  The instep is another story.  I didn't do them as written.  Decided to knit this in the round after creating the heel and gusset, like any other top down sock.  Then I proceeded to pull too tightly and have a huge mess on sock 1.  RIPPED it out, said some not-so-nice words and made sure to leave a long span of yarn over the orange area.  TA DA!  Now, there are a million little ends to weave in this way rather than, say NONE, the other way, but oh well!


These were knit in Knit Picks Palette yarn using Corn Flower Blue, Oyster Heather, Cornmeal and Orange.

Friday, September 26, 2014

Grace Ennis Hawaiian Girl #7256 from 1953


This is the pattern that most people go GAGA over.  What could be more 1950's than a Hula Girl?  Kitchy, Tiki, etc.  These are great!!!  And very scary!  There are so many color changes in small areas, but this is the pair you want in your collection!  I obtained this pattern early on in my collecting but just couldn't bring myself to try it.  A Ravelry group member of For The Love of Grace Ennis was willing to try it and her's looked SO good that I got the same yarn and tried it too!  THANKS ItsGretchen for your inspiration!

The yarn of choice here is Hikoo by Skacel CoBaSi (COtton, BAmboo, SIlk).  It is a little stretchy.  Has some nice texture to it and is SO soft!  Iris Blue, Chocolate Milk, Forest, Ripe Raspberry and Black.


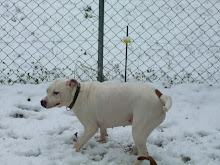
See my wonderful Yarn Bell in the background?  You know, the one that isn't holding my yarn, duh! This is my dog Chico and was created by Pots With Personality .  I sent a picture of Chico and she did the rest!  I LOVE him!!


AND, these are backwards.  Geez, you had one job!!  See the little black tip of land in front of the Hawaiian Girl?  That's the tip of Diamond Head on the other sock and the two should line up.....

SNEAK PEEK:
I've been working on WhoDunnit #7270, from 1954 and Western #7261, from 1953.  More progress pics. blah, blah...


Again, Grace Ennis suggested Angora Yarn for the smoke.  Didn't do it!  This yarn is an acrylic yarn, Sateen by Cascade Yarns.


Knit Picks again.  Bison, Almond, and Celestial.


Grace Ennis Jet Airplane Socks #7231

About a month ago now, I finally completed the Jet Airplane Socks.  I didn't get many pics of this pair in progress but I used my usual Knit Picks yarn in White, Black, Royal Blue, Serrano and Semolina.  I used a size 1 needle and my purl rows are usually knitted more loosely than my knit rows but on this pair I used a size 1 circular needle and found that not to be an issue.  Can't explain why that is though.


Grace Ennis suggests Angora yarn be used for the contrail or smoke but I didn't have any and used plain white wool.  It works and is MUCH less expensive.


Since all of Grace Ennis' Graphic Knitting Patterns socks are knit flat on two needles (or 1 circular as I did here) this is what the "leg" looks like before stitching up the back using the mattress stitch and starting on the heel flap.  


I didn't knit the instep according to the pattern.  If the design runs down into the instep, Grace wrote that you were to knit the instep flat as well and then stitch it to a gusset that was created without working in the round.  I did it this way on 1 pair and didn't like that I could see the stitching on the foot.  So, from then on, if a pattern extended into the instep I have been doing it in the round.  This means TONS of little ends to weave in later and you also have to be very careful that there is no pulling or puckering.  I may give the written pattern another go, who knows.


SNEAK PEEK:  I have also been working on #7217 Triangle Overlay Socks and will post progress pics as they are available.


Knit Picks, Corn Flower Blue, Cornmeal, Oyster Heather and Pumpkin.


Wednesday, September 24, 2014

Puppy Dog Wash Cloth Tutorial


I have a friend in Dallas, TX who runs a Pittie Rescue and asked for fundraising items and I made several little puppies for her gift baskets.  Since I have a house full of Pitties and I LOVE them best I knew I had to send her something.  I made a LITTER of PITTIES!  =)

Several people have asked how I made them so here is a little picture tutorial.  They are really cute and really fast!!


Don't know why the Supplies are upside down but what you will need for 1 puppy is:

1 regular wash cloth
1 sheet of felt for ears
Pom-Pom for nose
Extra-Long satin pins (to stick nose onto body)
Clear rubber bands.  I used the Goody brand from the hair section in WalMart
3/8" ribbon
lighter
Wilton Favor Kit (packaging, so optional)

Most wash cloths are folded at the store so work off the existing crease unless there is a decorative band like the one above.  Fold those like the one pictured so we can hide that band when rolling the  wash cloth for legs.  You will now roll the opposite sides toward the center crease.  The tighter you roll, the skinnier your puppy!


Next, get a rubber band ready on your fingers and fold the rolled wash cloth in half with the crease on top.  Place your rubber band at almost half.  This will create the Puppy's neck.  You want the legs to be just slightly longer than the head.


You will now create the "muzzle" or "face" of the puppy and secure with a rubber band.


Use the template provided to create the ears out of your chosen felt color.  I have a yellow wash cloth and I chose brown felt ears.  


Using your finger, gently push the felt through the head and adjust the ears to your liking.


For mine, since they are not intended as toys for children or dogs, I didn't secure any items permanently.  If the recipient wants to take the puppy apart and use the wash cloth for its intended purpose, no harm no foul.  If you would like to create a puppy for a toy, please remember that small items can cause a choking hazard and glue your nose, ears and bow/collar on securely!

I used an extra-long satin pin (from the sewing section) to put my pom-pom nose onto my puppy like this.


Next, tie a length of grosgrain ribbon around the puppy's neck and tie a bow.  From point to point, my ribbon was 17 1/2" long.  This is to conceal the rubber band at the neck as well as make your puppy SUPER cute!  Be sure to use the lighter to seal the ends of the ribbon so it will not fray/unravel.  


Ta Da!!  You're done!!  I put my puppies in the Wilton Favor Kit bags.  They are intended for stacks of cookies or a cupcake and come with the little cardboard disks to make the bags sit flat.  Perfect for packaging your PUPPY for gift giving!!  You will find these in the cake decorating isle of WalMart.  Have fun with these little guys!!!  =)


You will need to enlarge this but this is the ear template I created.  My ears are 6 1/4" long and the roundest part of the ear is 1 1/2" wide.