Showing posts with label free pattern. Show all posts

Tuesday, November 29, 2011

K2P2 Bulky Weight Pit Bull Keyhole Scarf Pattern!! FREE!!!

you can see strings of yarn that still need to be woven in, sorry....

sunlight streaming in through the sliding glass door...sorry

not the right angle, lots of movement and blur, sorry...

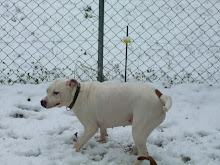
UPDATE!!:  No, these are not pictures of a giant Pit Bull modeling a hand-knit scarf they are pictures of a silly Yellow Lab modeling  the hand-knit scarf above mentioned Pit Bull refused to wear this morning for pictures.  I won't even tell you about the huge pee-pee puddle that resulted in the trying on of the scarf!!!  =(  UGH!  This is too large for Cade Brooke although she was a sweetheart and let me put it on her and take a few pictures.  You can see the large gap above the keyhole which is not what you want and wouldn't be there on Chico!  Also, the tails are a little too long for her as well.  I could fold this in half and tuck both ends in through the loop of the fold and this would be the perfect size for her, may just do that and let Chico shiver!

Yes, this is a pattern but more of a method.  I'll give you the numbers I used but if you don't have a giant whimpy baby Pit Bull you will have to use the METHOD instead of the PATTERN to adjust for your doggie.

First I measured around Chico's neck and got 17.5"  I'm going to add two inches to that so I need the area wrapped around his neck to be 19.5" long.  Yes, yarn is stretchy but you don't want it too tight or the scarf is uncomfortable and your pooch is just going to wrestle it off.  FAIL!  On the other hand, if you make it too loose so that there is a gap between creature and nice warm scarf, it will get hung on something, pulled at by doggie pals, paws and legs all akimbo, you get the picture.  This scarf needs to FIT.

I used US size 15 (10 mm) single point bamboo needles and Lion's Brand Homespun in a sapphire blue and chocolate brown.  No tags available but I do remember the brand.  This is a highly textured bulky weight yarn so the ribbing pattern wasn't important.  If you were to use a non-textured yarn like Lion Brand Thick and Quick, the ribbing would show and needs to start with a Knit2 and end with a Knit2.  More on this later.

To determine the width of your scarf, measure your dog's neck.  How wide do you want it?  I actually started casting on and just placed the needle against his neck since he was laying in my lap when I started this.  I decided I liked the look at 6" wide which was 20 stitches.  Like I stated above, this was a Knit2, Purl2 across and I ended in a Purl2 but that didn't matter with the textured yarn.  For a smooth yarn I would have taken it up or down by 2 so that I could start with a Knit2 and end with a Knit2. 

Cast on desired number of stitches.  (20 for my example scarf).
Row 1: Knit 2, Purl 2, Knit 2, Purl 2, Knit 2, Purl 2, Knit 2, Purl 2, Knit 2, Purl 2.  Turn.
Row 2: Knit 2, Purl 2, etc. across (***if you end on a Knit2 then when you turn, you will have to Purl those, then Knit, etc.)


Repeat these until your tail is the desired length.  I chose to keep mine short enough that it doesn't drag and he can't get the tails in his mouth to chew them.  It is up to you.  My tail is 6 inches long.  Now start your KEYHOLE.  Depending on how many stitches you cast on (20 for me) divide that number in half and only work the first (10) stitches back and forth for 10 rows.  You don't have to remove the second half, just keep them on the back of your needle. 
KEYHOLE Row 1:  Knit 2, Purl 2, Knit 2, Purl 2, Knit 2.  Turn.
KEYHOLE Row 2:  Purl 2, Knit 2, Purl 2, Knit 2, Purl 2. Turn.  Repeat Rows 1 and 2 for a total of 10 rows.  Break yarn.  Go to the stitches you left behind earlier and join yarn.  Proceed with KEYHOLE Row 1 and Row 2 for 10 rows.  Now on Row 11 continue across ALL stitches.  You just closed up your Keyhole.  Now you are going to create the body of your scarf.  This is where the size of Phydouex's neck is important.  I said his neck was 17.5" and that I was going to add 2 inches.  The 2 additional inches are for the gathers and overlap in sticking one end through the Keyhole opening so that the scarf is not too tight.


After you knit the body for your desired neck width, mine being 19.5" then lay your scarf out folded where the end should go into the keyhole and decide how long you need to knit this end to have it match up with the first tail.  You have a 6" tail and a keyhole that is 10 rows.  For mine to equal out, and with my knitting gauge, I needed to continue on for 10".  Once your ends are the same length, bind off loosely in pattern.  Ta Da!!  Poochie Scarf!


Of course, you could create this scarf for a person and the same instructions apply... =)

Wednesday, July 20, 2011

Elephants on Parade Drink Cozy!!

Here is the little Drink Cozy for today!  Elephants on Parade, or Pink Elephants...not while you're driving!!!  Knit Flat on 2 Single Point Needles and stitched up the back to form a tube.

Elephants have little top knots and fuzzy tail ends so I added those for a little whimsy!  You could easily add bows to the head/tails to make them (or one) girl elephants.

Color Chart.  Decrease on every row, Knit and Purl for 3 rows indicated by the green squares.  You are going from 46 stitches to 40 stitches total.  You don't need to do them right where the green squares are but make sure not to do a decrease as your first stitch.  It seems to make the Mattress Stitch more difficult at that point.  This step is optional.  If you are using a straight side drink container there is no need to make the bottom of your cozy slightly smaller than the top.  I do this because for the most part, mine are used on McDonald's Frappe cups which are tapered.

Making the fuzzy top knot.  Take your 4 ply yarn, pull two (2) ply out and thread on needle.  Go into the side of an already knit stitch like so and pull one end through.  You are sort of going under the stitch.

Now, remove needle and tie a very tight knot.  Cut to desired "Top Knot" length and really work the ends to fuzz them up.  You could even brush them!


See, Cute huh?
Follow the above instructions for both elephant's top knots and the tails.  It is easier (to me anyway) to do the tails at the back seam after it is stitched together, as shown here.

I used Lion Brand Vanna's Choice yarn in Grey Marble #401 for the elephants.  It is mottled with black, tan and brown and little random coarse threads that resemble Elephant Hair.  The speckles reminded me of every elephant I've ever met in that they are never clean!!  Oh well, use whatever colorway you like for your own elephants, this one just looked rather "elephant-y" to me.

The pink yarn is some vintage skein from my grandmother's stash that I was lucky enough to end up with.  It has moved with me several times and after all these years finally found it's calling today!  A soft pink Caron brand marked at just $.87!!  I also used a small scrap (4 inches) of Vanna's Choice in Black for the eyes and Red Heart Super Saver in White for the Tusks and Toenails.  I won't lie, I'm a knotter!  So all the little ends are knotted before weaving in! 

PATTERN:
Cast On:  46 stitches in main color using US size 6(4.25mm) Single Point Needles. 
K1P1 ribbing for 3(4) rows.
Knit Chart.  Knit in one direction, Purl in the other. 
Since this seemed to grow on me I would probably leave the bottom ribbing off next time.  The elephants needed so much space and I didn't take that into consideration on paper.
If you choose to use the K1P1 ribbing at the bottom edge, remember to bind off in pattern. 
Sew on your Top Knots and Tail Fuzz if using.  Use the Mattress Stitch to sew up the back.  Sew Tail Fuzz at seam and you are all done!  Yay!!!  FUN re-usable drink cozy.

Tuesday, July 19, 2011

Fish in the Sea Coffee Cup Cozy!!


This Cozy is knit flat on 2 Single Point Needles and stitched up the back to form a tube.

Cast On 48 Stitches in White.
 K1P1 Ribbing for 3(4) rows. 
On the chart above I knit/purl 4 rows of white before starting the waves and in the knitted example I didn't do that.  I knit 1 and purled 1 before starting the waves so that I would have more "ocean".  Knit the chart in blue (water) and orange (Fishies). 
The first knit row after the last row fo Fish, Knit 2TOG at the red squares on each end.  This will decrease your stitches to 46. 
Purl a row.  Now knit and at the red squares, Knit 2TOG to decrease your stitches to 44. 
Purl a row.  Knit row and knit 2TOG at the red squares to decrease your stitches to 42.
At this point I bound off to finish the cozy without further ribbing but you could add  3(4) rows of K1P1 ribbing to match the top.  Use the mattress stitch to sew up the sides and weave in your ends.  YAY!!  Re-usable Drink Cozy! 

For this project I used scraps of Red Heart Super Saver Solids in White, Delft Blue (0885) and Gold (0321) but you could use any color combo you like.  Make the fish bright tropical colors even!!  That would be FUN!

I will sew black seed beads to the fish for eyes.  I didn't attempt last night and forgot to pack them this morning but your run of the mill, everyday round glass seed beads would work really well.  Very small buttons would also work for eyes.  White/clear/pearlized buttons would make really cute "bubbles" coming up from the fish mouth too!!

I used Size 6(4.25) Single Point Needles and a Darning needle.